
클래스 구조의 C++ DLL 사용하기
이번에는 클래스 구조의 C++ DLL 사용하는 방법을 알아보곘습니다.
DLL 파일 준비하기
[C++] 클래스를 DLL로 만들고 사용하기
클래스를 DLL로 만들고 사용하기 클래스를 DLL로 만들고 사용하는 방법을 알아보겠습니다. 클래스 구조 코드 준비하기 헤더파일(.h파일) #include using std::cout; using std::endl; #include using std::string; class
rurustory.com
저는 지난번 포스팅에서 만든 DLL를 사용하여 만들겠습니다.
DLL 구조
#include "ctest.h"
#define DLL __declspec(dllexport)

extern "C" {
	DLL TestClass* CreateTestClass();

	DLL void SetString(TestClass* obj, string data);
	DLL void SetBool(TestClass* obj, bool data);
	DLL void SetInt(TestClass* obj, int data);

	DLL string GetString(TestClass* obj);
	DLL bool GetBool(TestClass* obj);
	DLL int GetInt(TestClass* obj);

	DLL void DeleteTestClass(TestClass* obj);
}
DLL 호출하기
C#에서는 C++과 다르게 헤더파일(.h)이 필요가 없습니다.
DllImport 라는 함수를 사용하여 DLL의 함수를 가져올수 있습니다.
[DllImport("DLL 경로와 파일명")]
사용할 함수();
DLL 함수 클래스로 감싸기
사실 클래스로 감싸지않고 바로 사용을 할 수도 있지만 나중에 좀 더 사용하기 편하게 DLL를 C# 클래스 형태로 만들어보겠습니다.
코드
using System;
using System.Runtime.InteropServices;

namespace DLLTest
{
    class TestClass
    {
        [DllImport("D:\\C_Project\\ctest\\x64\\Release\\ctest.dll", CallingConvention = CallingConvention.Cdecl)]
        static private extern IntPtr CreateTestClass();

        [DllImport("D:\\C_Project\\ctest\\x64\\Release\\ctest.dll", CallingConvention = CallingConvention.Cdecl)]
        static private extern void SetBool(IntPtr obj, bool data);

        [DllImport("D:\\C_Project\\ctest\\x64\\Release\\ctest.dll", CallingConvention = CallingConvention.Cdecl)]
        static private extern void SetInt(IntPtr obj, int data);

        [DllImport("D:\\C_Project\\ctest\\x64\\Release\\ctest.dll", CallingConvention = CallingConvention.Cdecl)]
        static private extern bool GetBool(IntPtr obj);

        [DllImport("D:\\C_Project\\ctest\\x64\\Release\\ctest.dll", CallingConvention = CallingConvention.Cdecl)]
        static private extern int GetInt(IntPtr obj);

        [DllImport("D:\\C_Project\\ctest\\x64\\Release\\ctest.dll", CallingConvention = CallingConvention.Cdecl)]
        static private extern void DeleteTestClass(IntPtr obj);

        private IntPtr obj;

        public TestClass()
        {
            obj = CreateTestClass();
        }

        ~TestClass()
        {
            DeleteTestClass(obj);
        }

        public void SetBool(bool data) { SetBool(obj, data); }
        public void SetInt(int data) { SetInt(obj, data); }

        public bool GetBool() { return GetBool(obj); }
        public int GetInt() { return GetInt(obj); }

    }
}
코드 설명
[DllImport("D:\\C_Project\\ctest\\x64\\Release\\ctest.dll", CallingConvention = CallingConvention.Cdecl)]
static private extern IntPtr CreateTestClass();

[DllImport("D:\\C_Project\\ctest\\x64\\Release\\ctest.dll", CallingConvention = CallingConvention.Cdecl)]
static private extern void SetBool(IntPtr obj, bool data);

[DllImport("D:\\C_Project\\ctest\\x64\\Release\\ctest.dll", CallingConvention = CallingConvention.Cdecl)]
static private extern void SetInt(IntPtr obj, int data);

[DllImport("D:\\C_Project\\ctest\\x64\\Release\\ctest.dll", CallingConvention = CallingConvention.Cdecl)]
static private extern bool GetBool(IntPtr obj);

[DllImport("D:\\C_Project\\ctest\\x64\\Release\\ctest.dll", CallingConvention = CallingConvention.Cdecl)]
static private extern int GetInt(IntPtr obj);

[DllImport("D:\\C_Project\\ctest\\x64\\Release\\ctest.dll", CallingConvention = CallingConvention.Cdecl)]
static private extern void DeleteTestClass(IntPtr obj);
먼저 DllImport 를 이용하여 DLL의 함수들을 가져옵니다.
C#에서는 IntPtr 를이용하여 C++의 오브젝트 주소를 가져올 수 있습니다.
private IntPtr obj;

public TestClass()
{
    obj = CreateTestClass();
}

~TestClass()
{
    DeleteTestClass(obj);
}
IntPtr 형태의 obj를 생성하고 생성자에서 C++에서 만들어 놓은 CreateTestClass()를 이용하여 obj에 객체를 생성해줍니다.
그리고 소멸자에 꼭 C++에서 만든 DeleteTestClass()를 이용하여 동적할당을 해제해줍니다.
public void SetBool(bool data) { SetBool(obj, data); }
public void SetInt(int data) { SetInt(obj, data); }

public bool GetBool() { return GetBool(obj); }
public int GetInt() { return GetInt(obj); }
TestClass의 함수들을 만들어주고 return으로 C++ 의 함수들을 다시 재호출하여 TestClass 함수만 사용해도 C++ 함수들을 사용할 수 있도록 만들어줍니다.
클래스 테스트
전체 코드
using System;
using System.Runtime.InteropServices;
namespace DLLTest
{
class TestClass
{
[DllImport("D:\\C_Project\\ctest\\x64\\Release\\ctest.dll", CallingConvention = CallingConvention.Cdecl)]
static private extern IntPtr CreateTestClass();
[DllImport("D:\\C_Project\\ctest\\x64\\Release\\ctest.dll", CallingConvention = CallingConvention.Cdecl)]
static private extern void SetBool(IntPtr obj, bool data);
[DllImport("D:\\C_Project\\ctest\\x64\\Release\\ctest.dll", CallingConvention = CallingConvention.Cdecl)]
static private extern void SetInt(IntPtr obj, int data);
[DllImport("D:\\C_Project\\ctest\\x64\\Release\\ctest.dll", CallingConvention = CallingConvention.Cdecl)]
static private extern bool GetBool(IntPtr obj);
[DllImport("D:\\C_Project\\ctest\\x64\\Release\\ctest.dll", CallingConvention = CallingConvention.Cdecl)]
static private extern int GetInt(IntPtr obj);
[DllImport("D:\\C_Project\\ctest\\x64\\Release\\ctest.dll", CallingConvention = CallingConvention.Cdecl)]
static private extern void DeleteTestClass(IntPtr obj);
private IntPtr obj;
public TestClass()
{
obj = CreateTestClass();
}
~TestClass()
{
DeleteTestClass(obj);
}
public void SetBool(bool data) { SetBool(obj, data); }
public void SetInt(int data) { SetInt(obj, data); }
public bool GetBool() { return GetBool(obj); }
public int GetInt() { return GetInt(obj); }
}
class test
{
static void Main(string[] args)
{
TestClass lib = new TestClass();
lib.SetBool(true);
lib.SetInt(200);
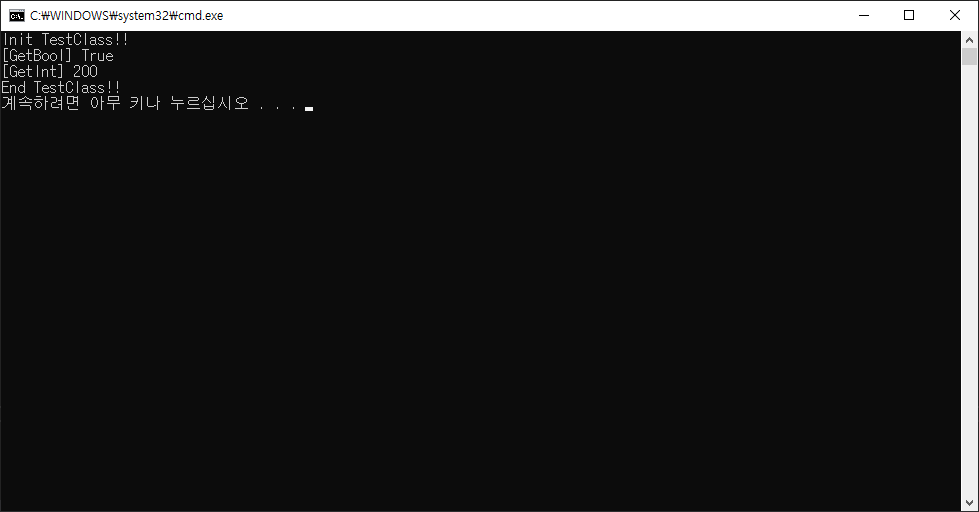
Console.WriteLine("[GetBool] " + lib.GetBool());
Console.WriteLine("[GetInt] " + lib.GetInt());
}
}
}
이제 우리가 아는 클래스 형태로 C++의 DLL를 사용할 수 있습니다.
실행 결과
마무리
추가로 C++ 문자열을 C#에서 쓰는게 조금 복잡해서 따로 포스팅을 하였습니다.
궁금하신 분들은 아래 링크에서 확인 할 수 있습니다!
[C#] 다양한 방법으로 C++ DLL String 사용하기
다양한 방법으로 C++ DLL String 사용하기 C#에서 C++로 문자열을 전달을 해줄때 자동으로 데이터를 맞춰주지만 C++에서 C#으로 문자열을 전달 할때는 수동으로 데이터를 맞춰야 합니다. 지금부터 다
rurustory.com
잘못된 점이 있거나 궁금한 점이 있다면 언제든지 문의해주시기 바랍니다!
'프로그래밍 > C#' 카테고리의 다른 글
| [C#] 다양한 방법으로 C++ DLL String 사용하기 (0) | 2024.02.21 |
|---|
